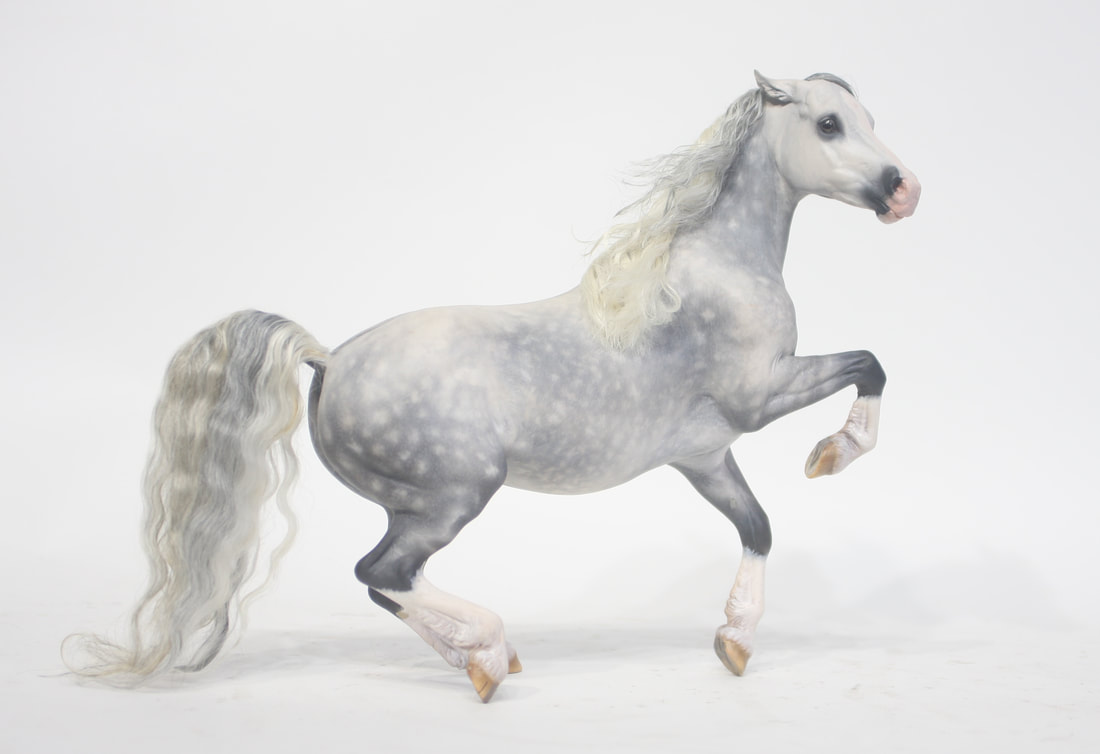
 I've had the photos for this tutorial for over half a year and just haven't sat down to write it all up, so here it goes! In this post I will be showing how I created the dappled grey custom "Wrynn". Supplies:I used Earth Pigments brand powdered pigments as my colorant. (Natural Black* and Titanium White) Pearl-Ex (Micropearl) Acrylic paint (Mars black and Titanium White for the basecoat, and others for markings and detailing) A few clean fluffed out older brushes a kneaded rubber eraser an eraser pencil Testors Dullcote matte sealer *It appears they no longer have a color called Natural Black. I believe it's been replaced by Vine Black but can't say 100%. Step 1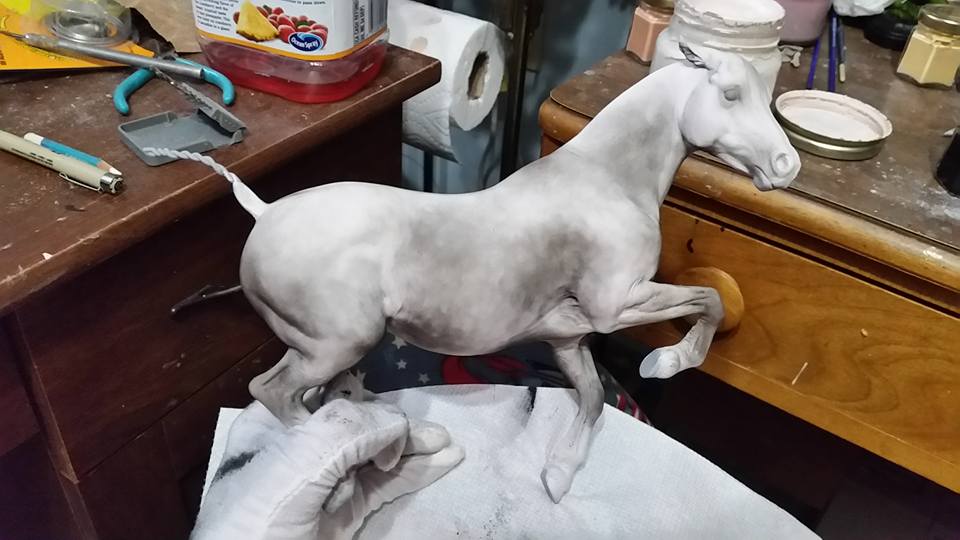 Ok Step 1 is really to basecoat. For her I did a very pale grey, not pure white. After that, I spray with dullcote, which gives it even tooth. Then I take a fluffy old paintbrush and work some Natural Black Earth Pigments into any areas I want more contrast. Check your reference photos!! You cannot expect to catch all of the nuances if you don't look at them closely. On this mare I wanted the darker areas around the back of the hindquarters, flank, behind the shoulder, and along the sides of the neck. The knees and hocks are also darker. When I apply the pigments I use a circular motion. This helps give the dapples more natural variation. Step 2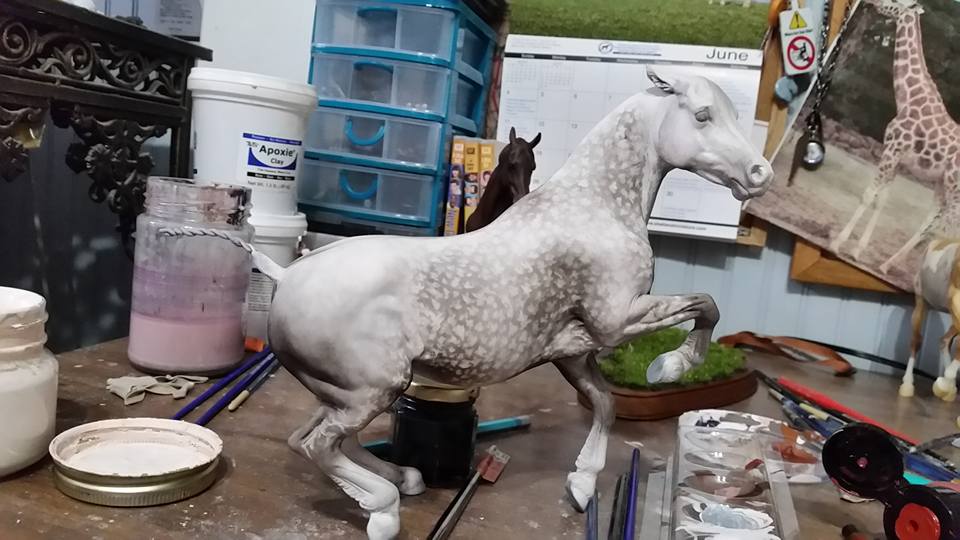 Next I take a kneaded rubber eraser, shape it to a point and pull the color off where you want the dapples to be. Pay close attention to the size and shapes of the dapples in various areas. Dapples can form bar patterns across the barrel. The star type dapples are more prominent on the hindquarters. I also pulled pigment on the gaskin area where the veins run as those hot spots are usually greyed out faster. After all of the dapples are pulled out, I take a large clean fluffy brush and gently brush over the dapples to soften them. You can go in and sharpen any dapples you need to with the eraser again. If you have small areas you want to erase, they make these really cool eraser pencils that you sharpen. Step 3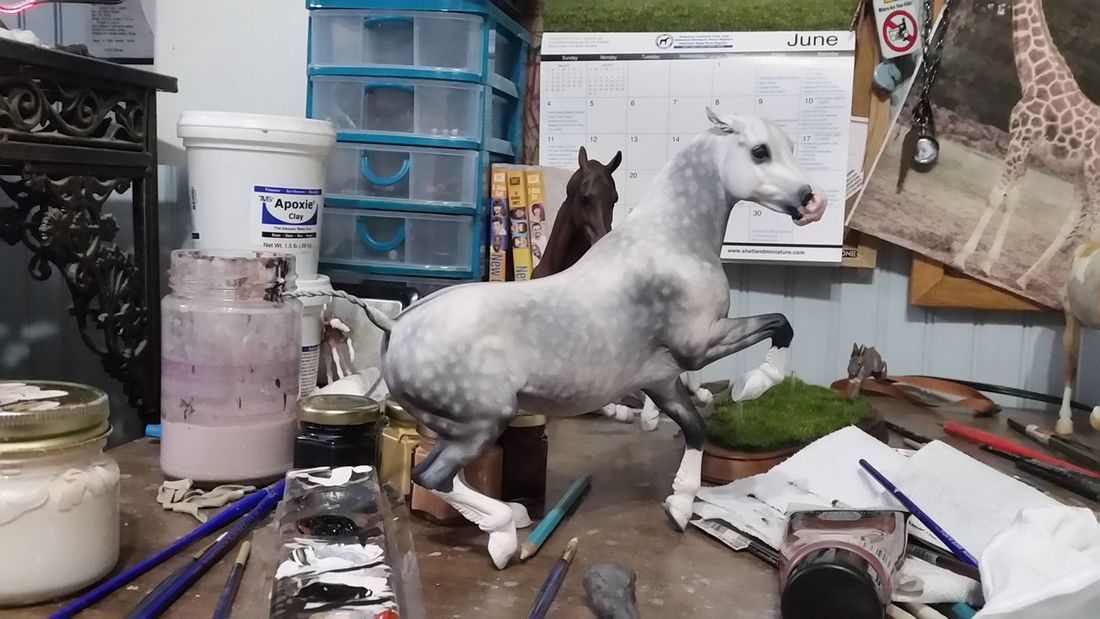 On this mare I want the black pigment to be a little softer so after sealing the first layer of black, I went over with a layer of white. I covered all but the very darkest areas. I sprayed again and then did another layer of black in the darker areas (hindquarters, knees, hocks, skin areas, elbows, and dorsal). You can use a small fluffed out shader for deepening the areas around the dapples as well. The second layer of dappling does not have to be exactly where all of the first dapples are. Some can be fainter than others. Here I have sealed her again, and added her markings. Step 4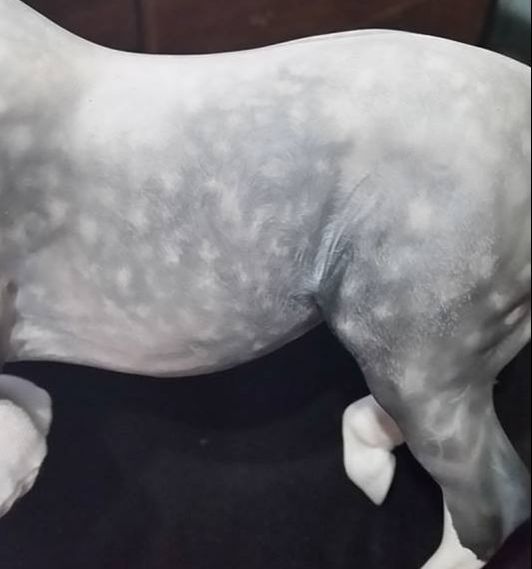 Now because I am crazy, I have decided to stipple her entire body with watercolor pencil in the direction of the hair growth. Greys in real life have sort of a grainy appearance and the effect this layer of pencil created was very believable. Step 5 After all of the pencil was done, I went and put a layer of Pearl-Ex Pearl over the whole horse. This gives the horse a sheen similar to a real horse, and helps to set all of the layers together. I use a large soft brush and really work the pearl into the finish. Then spray with Dullcote again. After the pearl is added, I finished the markings and detailing, and any white markings and areas got another coat of pearl-ex. I keep it off the areas that are bare skin. Step 6Seal one last time after the detailing is done! Next I added hair to this mare and glossed her eyes. Here she is all finished. Here are some other greys I have done this way. Some of those are fleabit as well. I have done fleabites with 2 different methods, and they each have their good points. The one on the left, Galina, was done with earth pigments flicked over the horse. You can erase areas that get too large or heavy. This method does take some practice. You must seal each area as you do it. The one on the right, Ziryab, was done with watercolor pencil (as were most of the others pictured above). In both cases I put a layer of Pearl-Ex Pearl over the final layer of fleabites to help them set into the coat. This keeps them from "floating" as much. 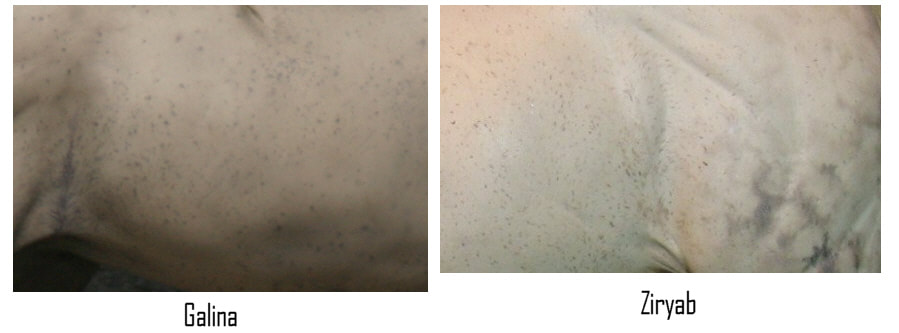 I hope this tutorial gives you some ideas on creating realistic greys. Happy Painting!
1 Comment
Rubygail
1/23/2018 08:20:04 am
This is by far the most helpful dapple grey tutorial I've seen! Thank you for this! Leave a Reply. |
AuthorNaMoPaiMo blog and general musings by artist Jen Kroll Archives
February 2020
Categories |
 RSS Feed
